Photo markup
Mark up an evidence photo so it shows exactly what you mean
Under any photo on a certificate, press Annotate. Circle the damaged socket, point an arrow at the loose connection, draw round the scorch mark or add a short label, then save. The original photo is kept, and the marked-up copy is what prints on the certificate PDF your client receives. It works on all 13 certificate types, and with no signal.

What it does
Exactly what you get
- Four tools: circle, arrow, freehand pen and a short text label.
- Four colours that show up on most photos: red, amber, white and black.
- Text labels are kept short, up to 40 characters.
- Undo, Redo and Clear while you work, and mouse, pen or finger all draw.
- The original photo is never replaced. The marked-up copy is saved alongside it and prints on the certificate PDF in its place.
- Edit reopens your marks, so you can change them later instead of starting again.
How it works
Three steps
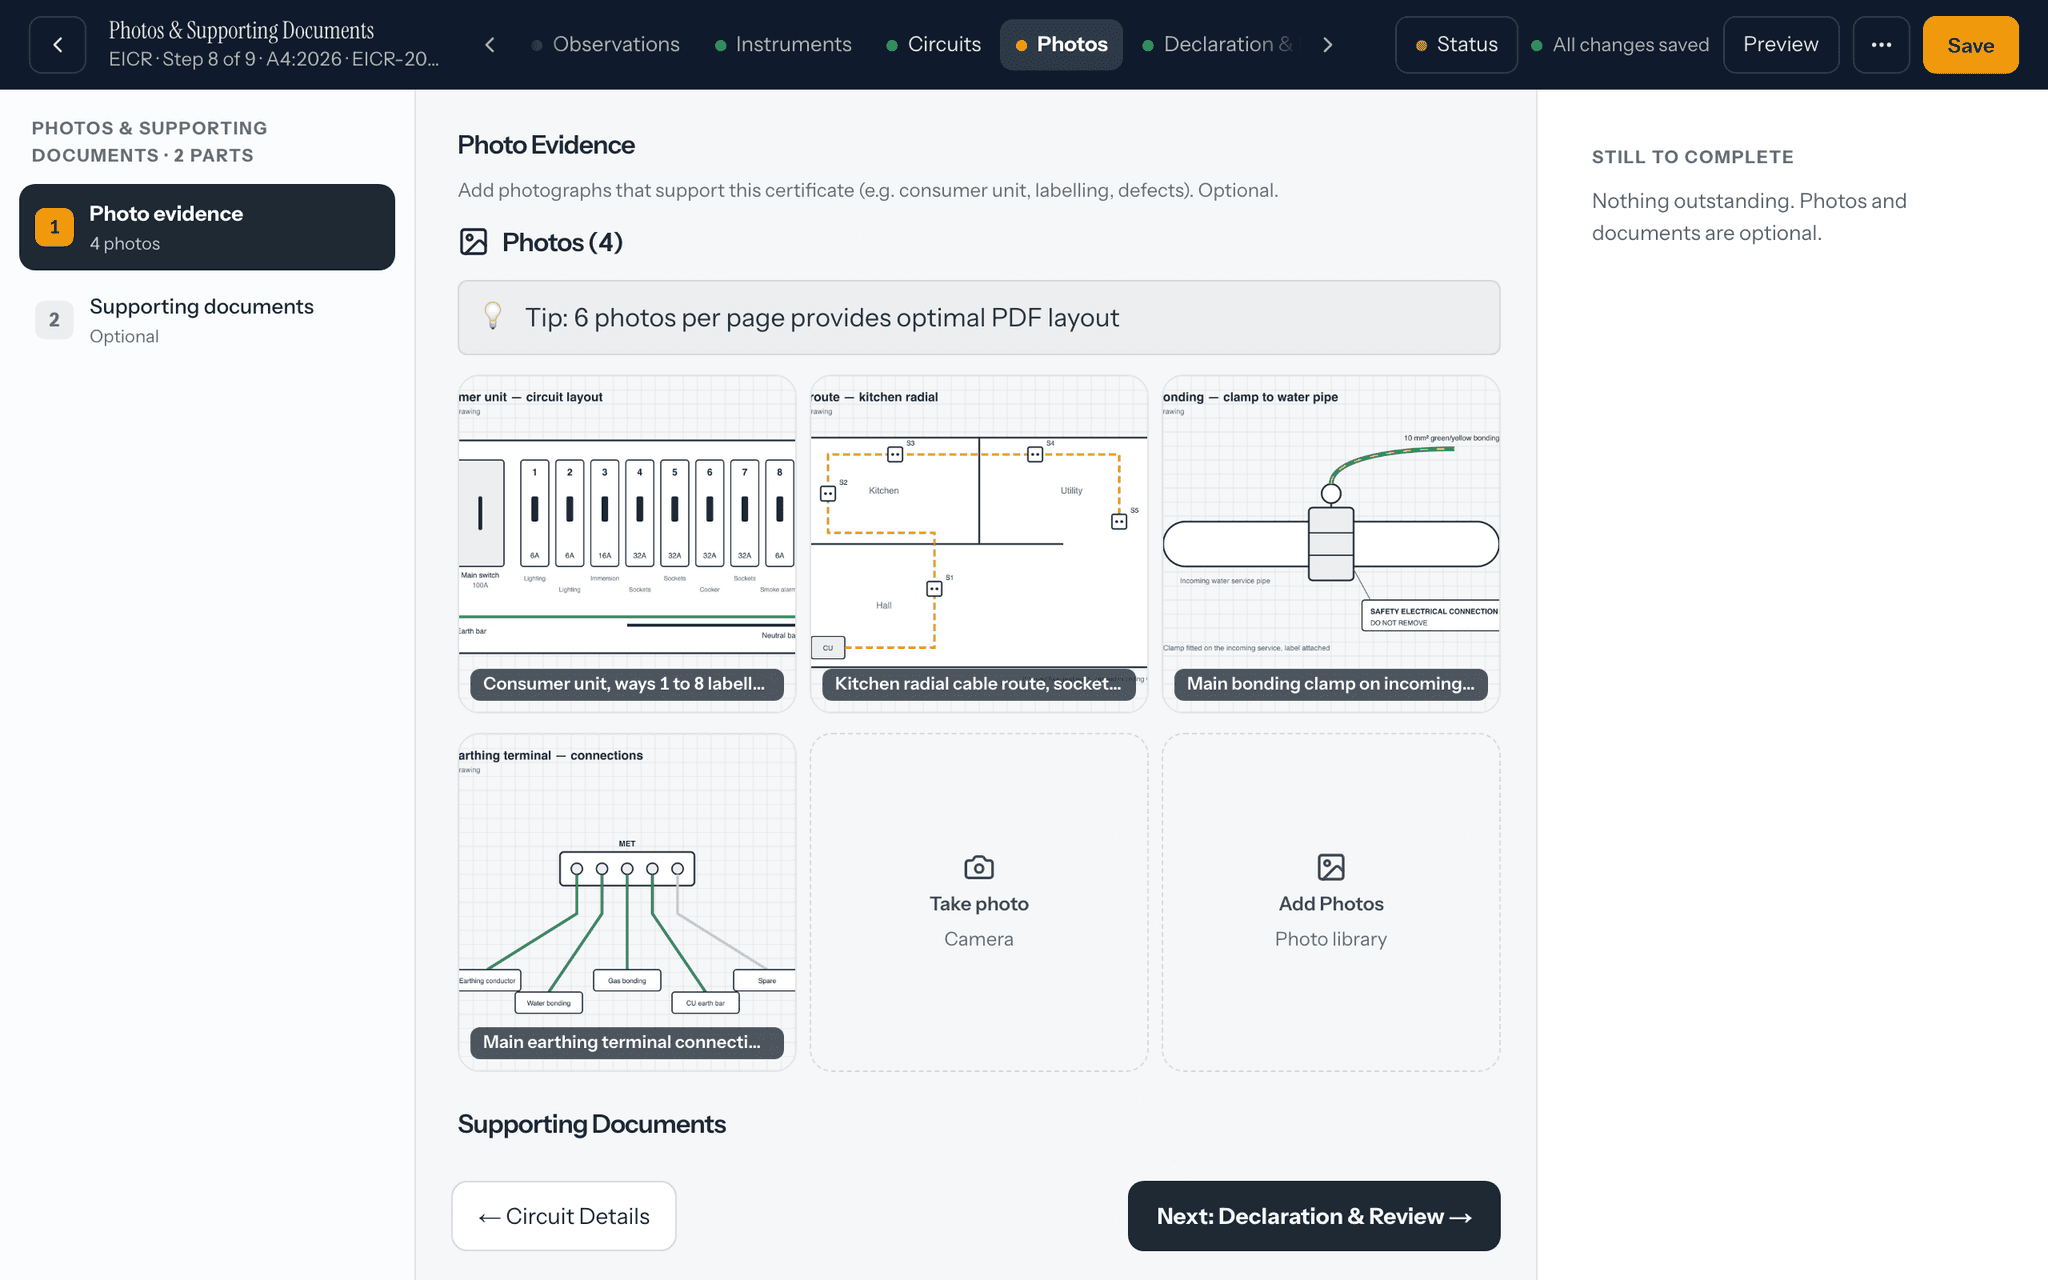
Take or add the photo
Add it on the Photos & Supporting Documents step, or in the photo box on an observation, as you do today.
Press Annotate and mark it up
Pick a tool and a colour, then draw. On a laptop the tools sit down the left; on a phone they sit along the bottom.

Save, and it prints
The marked-up copy prints on the certificate PDF. Show original brings back the unmarked photo whenever you need it.


Good to know
The details
- With no signal, the markup is saved on your device and uploads with the photo when you reconnect.
- Only people who can edit the certificate can mark up its photos. Office users cannot, and nothing can be marked up once the certificate is signed.
- Clear every mark and save to remove the markup and go back to the original.
Questions
Frequently asked questions
- Is the original photo kept?
- Yes. The marked-up copy is saved alongside the original, never over it. Show original brings back the unmarked photo, and clearing every mark removes the markup.
- Which version prints on the certificate?
- The marked-up copy prints on the certificate PDF in place of the original.
- Can I change the markup later?
- Yes, until the certificate is signed. An annotated photo shows Edit instead of Annotate, and reopens with your marks so you can change them.
- Does it work on every certificate type?
- Yes, on all 13 types, wherever you add photos: the Photos & Supporting Documents step and the photo boxes on observations and failed appliances.
- Does it work with no signal?
- Yes. Drawing happens on your device. The markup is saved there and uploads when you are back online.
Keep reading
Related features, certificates and guides
Get started with CertSync
All 13 certificate types, one subscription. The first month is free.
First month free, then from £15/month. No fixed-term contract. Cancel any time.